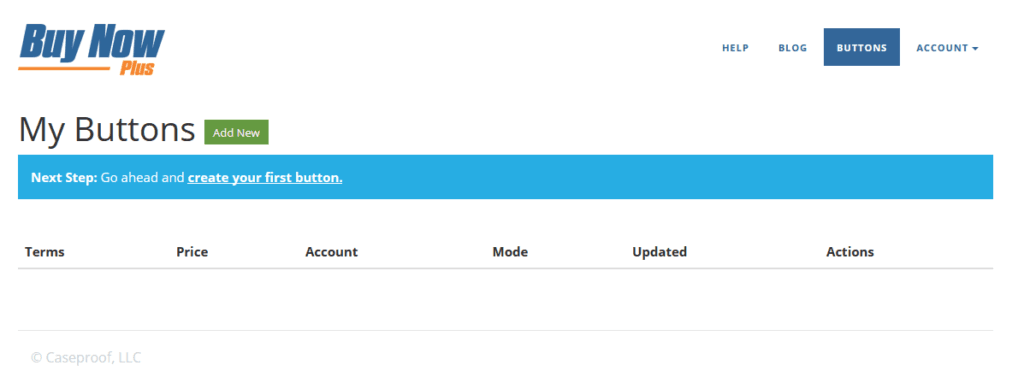
Once you login to Buy Now Plus, you will be taken to your “Buttons” page. If not you can simply choose “Buttons” from your menu. Then choose the “create your first button” link.

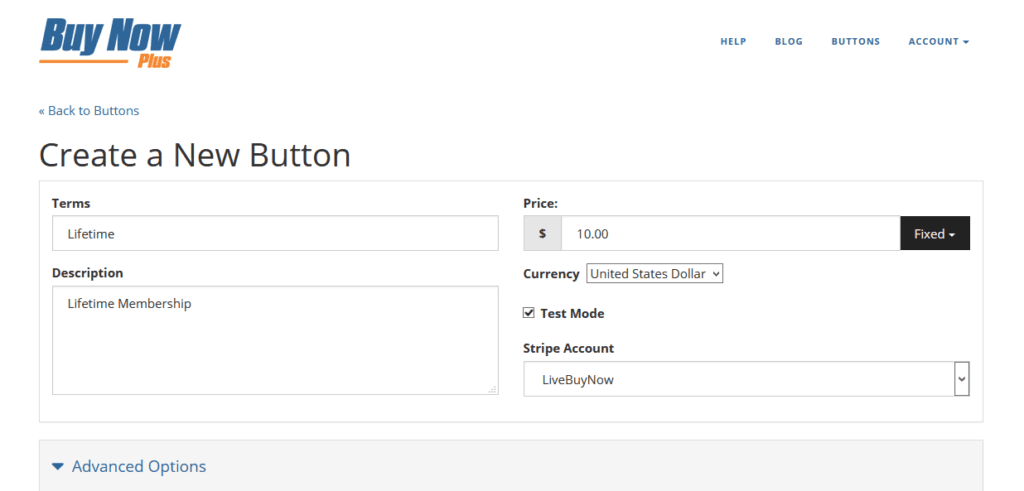
Once in the button Creator enter your Terms, Price, a Description and which account in Stripe you want it to be attached to in the Drop down.
Be sure to check the “Test Mode” box if you are testing

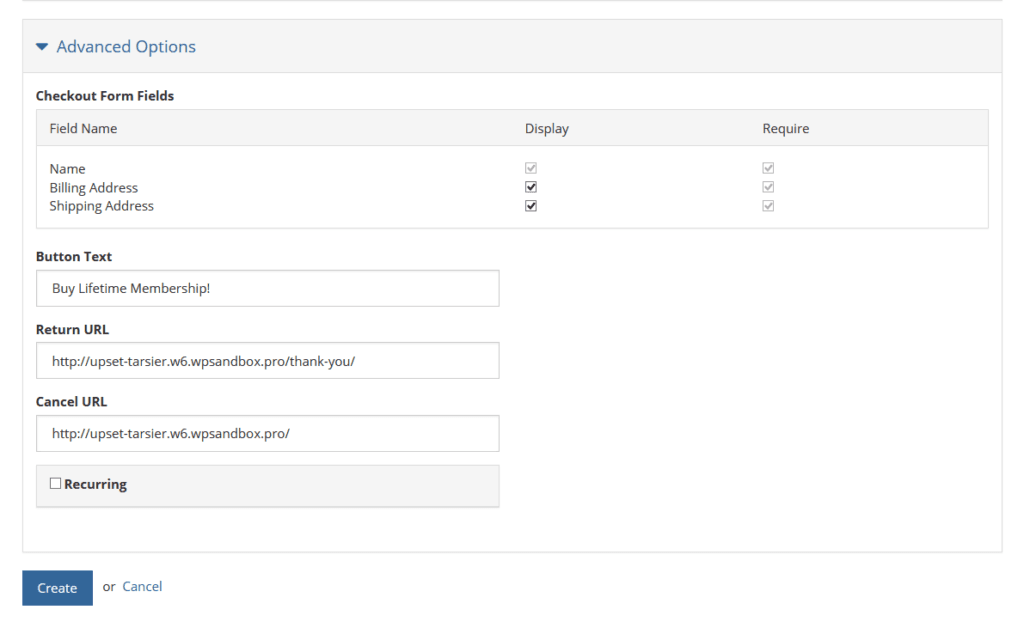
Advanced Options- Here you can add more information to your button checkout, like Name, Billing address, and Shipping address.
You can also add URLs to direct users to after purchase, and if they cancel.
Then hit the “Create” button

Now you will be taken back to your buttons and see it ready to use.

Once created, don’t forget to share it to your site or favorite social platform!
